Though few today are familiar with the working toboggan of the North Woods, it was once ubiquitous – the tool of trappers and travelers, a boon to anyone who had to wrest their living from the land. With a toboggan, a single person can haul nearly 200 pounds over snowy hills and frozen waterways, the sled gracefully riding the undulations of the landscape. For moving equipment in the winter woods, it is an indispensable tool.
A well-made toboggan is not only practical, but a thing of elegance and beauty. Unfortunately, there are few – if any – worthy toboggans commercially available these days. If you want a first-class toboggan, you’ll have to build your own. This article will show you how.
You’ll need to source high-quality ash, birch, oak, or maple lumber that is straight-grained and without major knots. This lumber will ideally be green, or at most air-dried for less than a year. The kiln-dried lumber available at most lumberyards won’t take the curl of the toboggan’s prow.
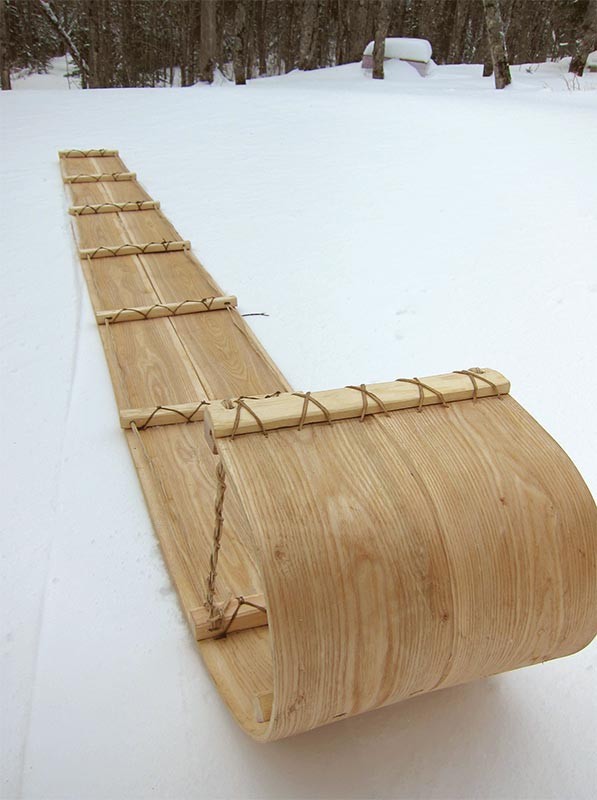
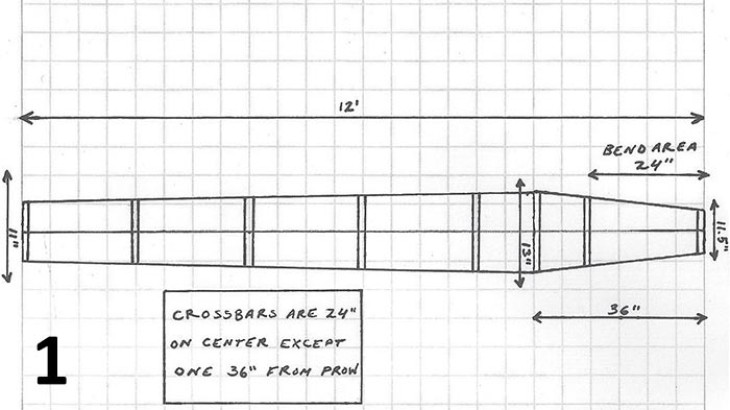
The finished toboggan [1] will be around 12 feet long and 13 inches wide at the shoulder, or widest point. Two planks will be required for construction, each plank about 7 inches wide. And it doesn’t hurt to prepare a third plank in case of breakage. So while you’re choosing wood, make sure that you will have enough material.
Once you have selected some likely pieces of wood, you need to reduce them in thickness to 5/16 of an inch. The best way I have found is to get to know a sympathetic sawyer and have him or her saw green boards to 3/8 of an inch (you’ll plane off the last 1/16 later). However, you can also resaw thicker boards on a band saw, or in the worst-case scenario, plane down standard 3/4-inch boards with a thickness planer. It is, of course, possible to start with a whole tree and then rive, hew, plane, and shave your board to thickness [2]. This is the old way, and though time consuming, it results in the strongest toboggan of all.
With your planks planed, find the two straightest edges and butt them up to one another. If large gaps are present, you may have to straighten the edges with a hand plane. The widest point of the toboggan (the shoulder) will be about 36 inches back from the prow.
From this point, use a chalk line to mark the taper along the length of the planks, from about 13 inches total width at the shoulder to 11 inches at the tail end. Cut away the portions outside of the chalk line and plane the edges. You may also plane a taper into the prow of the toboggan, starting about 36 inches from the prow and planning 3/4 of an inch off of each plank.
Next comes the most difficult and mysterious step in toboggan building. You’ll need to use boiling water or steam to help bend the first 24 inches of the toboggan into a sweeping curve. Start by screwing a temporary crossbar of scrap wood on the bottom side of the front end of both planks, fastening them together. Then screw on a second crossbar 25 inches from the end. Be sure to make the crossbars long enough that they overlap the toboggan on both sides by a couple of inches.
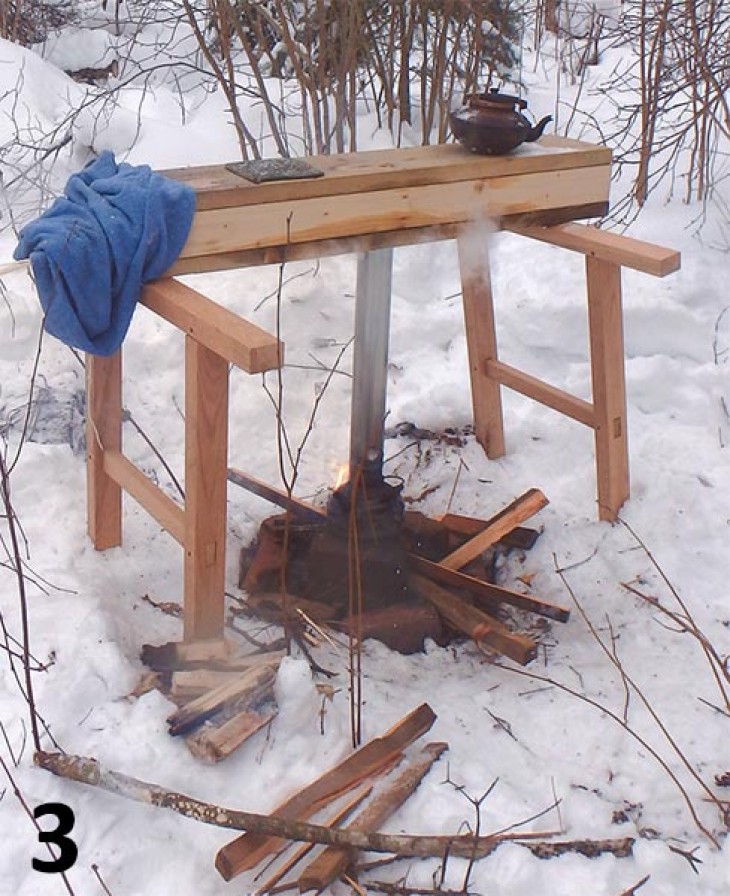
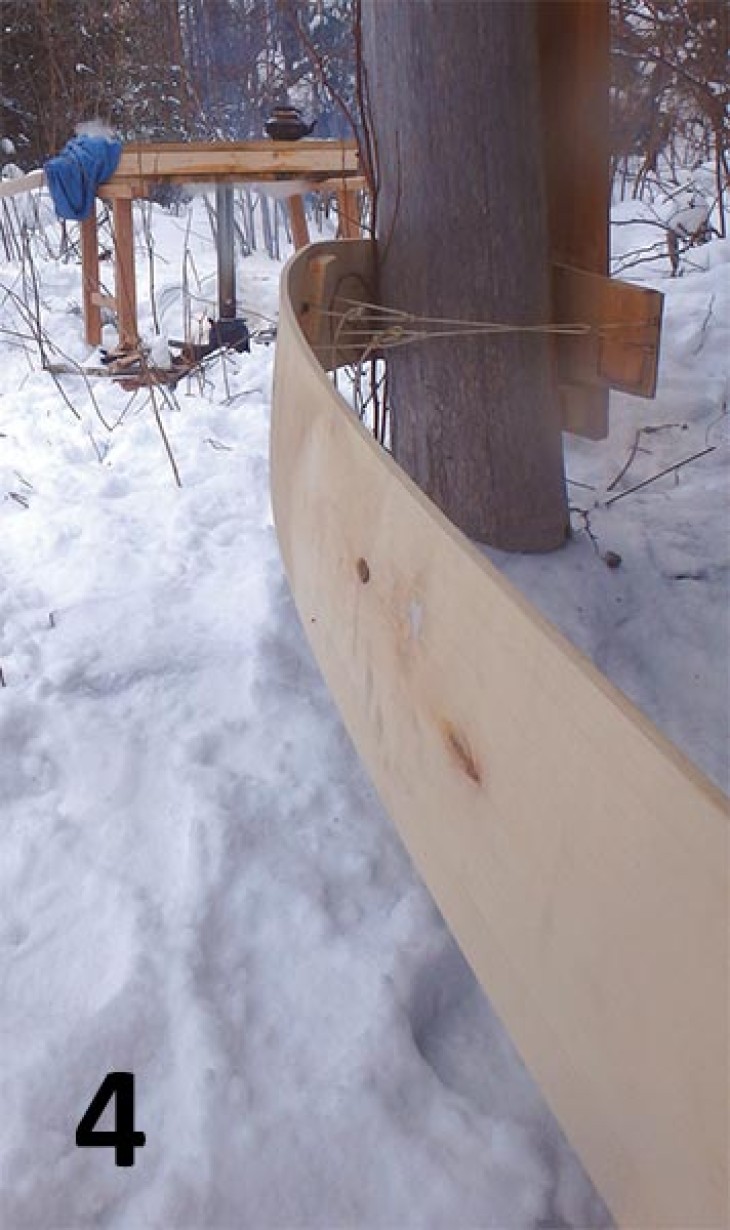
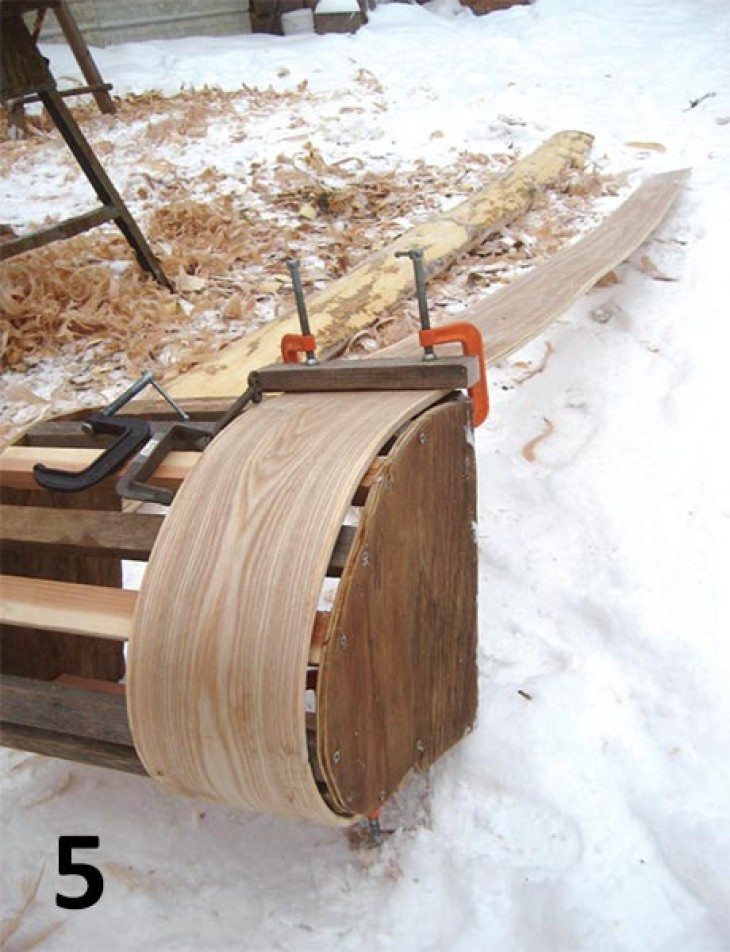
You’ll need to rig up a steamer [3]. Anything from a proper steam box to a steel drum full of boiling water will work, so long as the wood can be exposed to boiling water or hot steam for half an hour. You’ll also need a bending jig of some sort. A log, a round fence post, or even a crotch in a standing tree will do [4]. After boiling or steaming the first 24 inches of the toboggan for half an hour, quickly get to your bending jig and bend the area into a shapely curve [5]. It’s a good idea to have a helper for this part, as you’ll need someone to run a heavy cord or piece of stout wire around the overlapping ends of the crossbars once the curve has been created. This holds the curl in place while the bend sets.
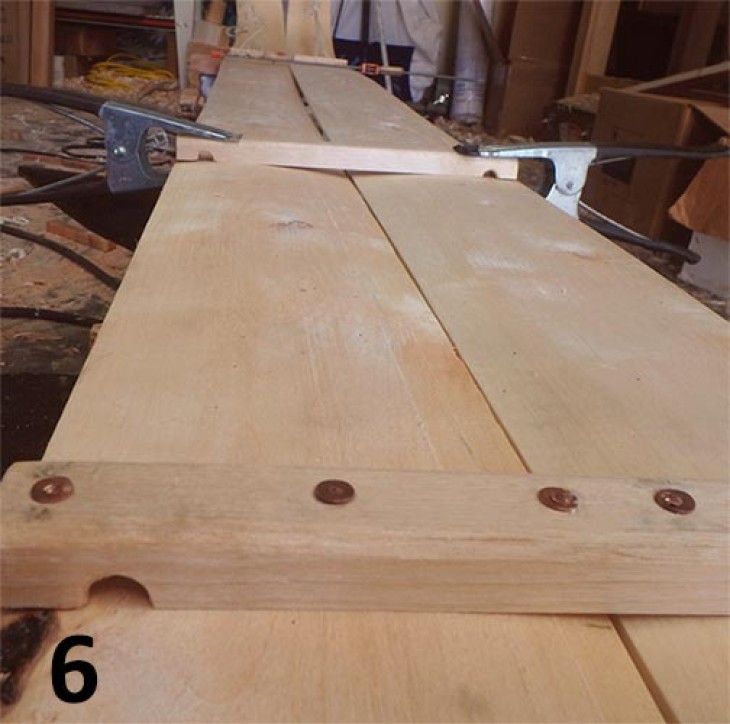
It’s best to leave the toboggan untouched for a few days while the curl you’ve created sets. During this time, you can get to work creating a set of eight crossbars, 7/8 of an inch by 3/4 of an inch, from the same wood you used for the planks. Create a notch 3/4 of an inch from both ends of each crossbar; the notch needs to be large enough for a piece of strong cord to fit. Then fasten each of these crossbars to both toboggan planks at 24-inch intervals using screws or copper rivets [6]. The result should be a crossbar at each end, five in between, and one extra. The extra gets fastened to the shoulder area of the toboggan. This is where you’ll attach your hauling line.
Put a knot in the end of a nylon cord and run it through one of the notches in the crossbar at the prow of the toboggan. Run this cord through each crossbar notch all the way down the length of the toboggan, and when you get to the end, pull tight and put another knot in that end. Repeat this maneuver on the other side. A good tip is to make the hauling line out of a 12-foot cord with a strap of heavy leather or canvas in the middle. This is what your shoulder will bear as you pull your sled.
Finally, treat the bottom of your toboggan as you would a wooden ski, with pine tar and paraffin wax. The top will benefit from a generous helping of boiled linseed oil or marine varnish.
If you’ve gotten this far, you’ve made a toboggan to be proud of, and the winter world is surely calling to you as snow falls in the forest. Put on your snowshoes, harness your toboggan, and enjoy the quiet magic of the winter trail.


