The word senescence, a fancy term that biologists use to refer to the process of growing old, has recently entered my vocabulary, and judging by the steady rate at which my nose hair has accumulated over the past few years probably not a moment too soon. I don’t know if there’s another word that relates specifically to psychological function and the aging process, but I should probably learn that, too, as I’m becoming increasingly curmudgeonly. The phrase “kids these days” has become a staple. A trip to the grocery store is just one big bitch fest.
$15 for a bag of charcoal! Are you kidding me!
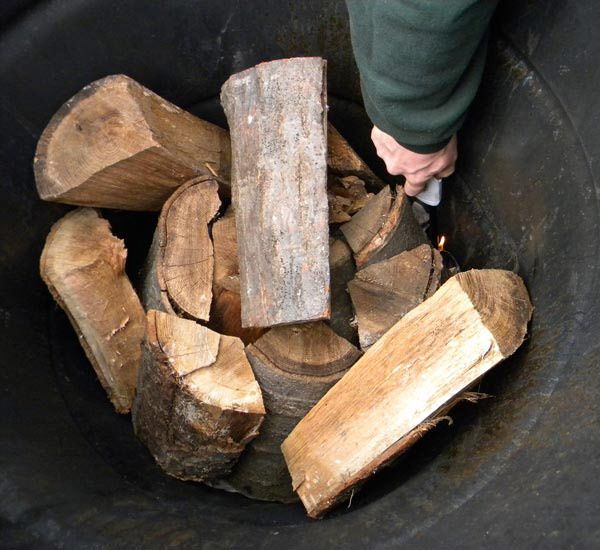
Anyway, after uttering just that the other day I decided to take matters into my own hands and just make the damn charcoal myself. Step one was to do some research on different wood properties, and turns out there’s a wealth of information out there, though as with anything on the Internet, the question is whether you can trust it or not. This site suggests that oak is the Queen of smoking woods (hickory is King), and since I had some red oak that was dry in my wood pile I went that route. I hope it’s apparent that I have no expertise at all when it comes to any of this, so if you know better about anything I’m writing about by all means chime in and share with the group.
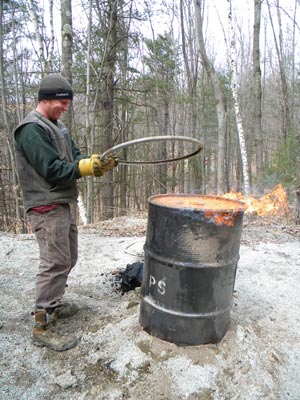
Step two was to call my brother Trev and see if he wanted in and he said “absolutely.” Come to find out he’s equally offended by the high price of charcoal. He scrounged a steel barrel and went down to his shop and cut some holes in the bottom. T and D Charcoal – nice, huh? As we were getting going we were considering slogans for our new business. “Soul Coal” and “Killer Queen” and “Our Oak Kicks Ash!”

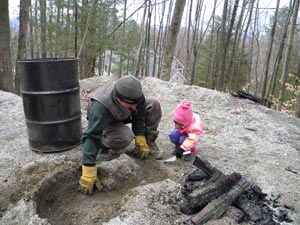
Step 3 was to conscript child labor. Tess, here, panoplied in OSHA-approved safety glasses and steel-toed Moon Boots, works for Cheerios.
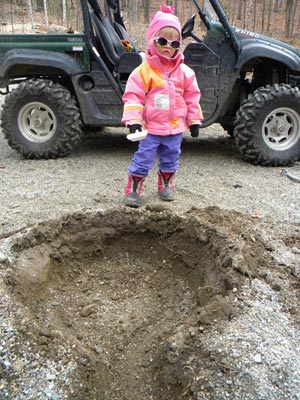
Step 4 was to dig a pit that the barrel could sit atop with a little air intake chamber that would turn the barrel into a giant charcoal chimney. The charred wood you see in this picture is from a test burn meant to take the paint off the barrel.
Step 5 was to put the barrel on the pit, fill it with wood, and then light it. It smoked pretty intensely for about 20 minutes, which is something you should consider if you try this at home and want to stay friendly with your neighbors, but the wood was really dry, and it was soon pure heat. At this point we clamped the lid down, plugged the air intake, and let it smolder.
Step 6 was to open the cooled barrel and analyze our char. What we found was that most of the wood hadn’t burned completely. I think our mistake was that the wood we started with was way too big. Probably you should use little chunks, no bigger than 6 inches long. Another problem, I think, was that the retort was just too flimsy. The steel barrel got hot quick, and then when we cut off the oxygen it got cold quick – maybe too quick. I don’t know how to remedy this, though, and maintain our $0 overhead.
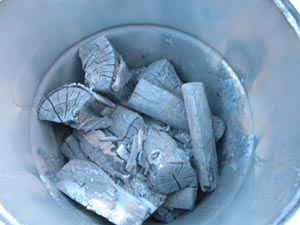
On the plus side, we were able to get some decent-sized pieces of charcoal out of the middle of the barrel, and it worked pretty well. It ignited very easily when we used it to cook. It didn’t really impart much flavor on the meat, though, which has me thinking that all the eloquent descriptions in the above referenced wood-properties web link must have been referring to green chips. Maybe you need to look at smoking as a two-wood process; you have the base char that provides heat – for this any high-density hardwood species would do – but then for the smoke you use separate, greener chips to impart flavor.
What do you think? There’s gotta be someone out there who can shed some light on all this.
Discussion *