George Washington Sears wrote for Forest & Stream (now Field & Stream) magazine under the pen name Nessmuk, a tribute to his Narragansett Indian childhood mentor who taught him traditional woodcraft. From the mid- to late 19th century, Sears filled the pages of outdoor magazines, as well as local newspapers, and even The Atlantic Monthly with stories of wilderness adventure. These tales wove lessons in conservation with practical tips for outdoor pursuits.
One tool that appears in Sears’ writing is a knife about 9 inches long, with an antler handle, that features a deep belly and a rounded spey point (some speculate it was actually made from a cut-down butcher’s knife). This pattern, which had become known as simply the “Nessmuk,” has experienced a resurgence with bushcrafters. The forward weight of the blade, coupled with the curved belly, makes for an ergonomic multipurpose knife that can slice, hack, and skin.
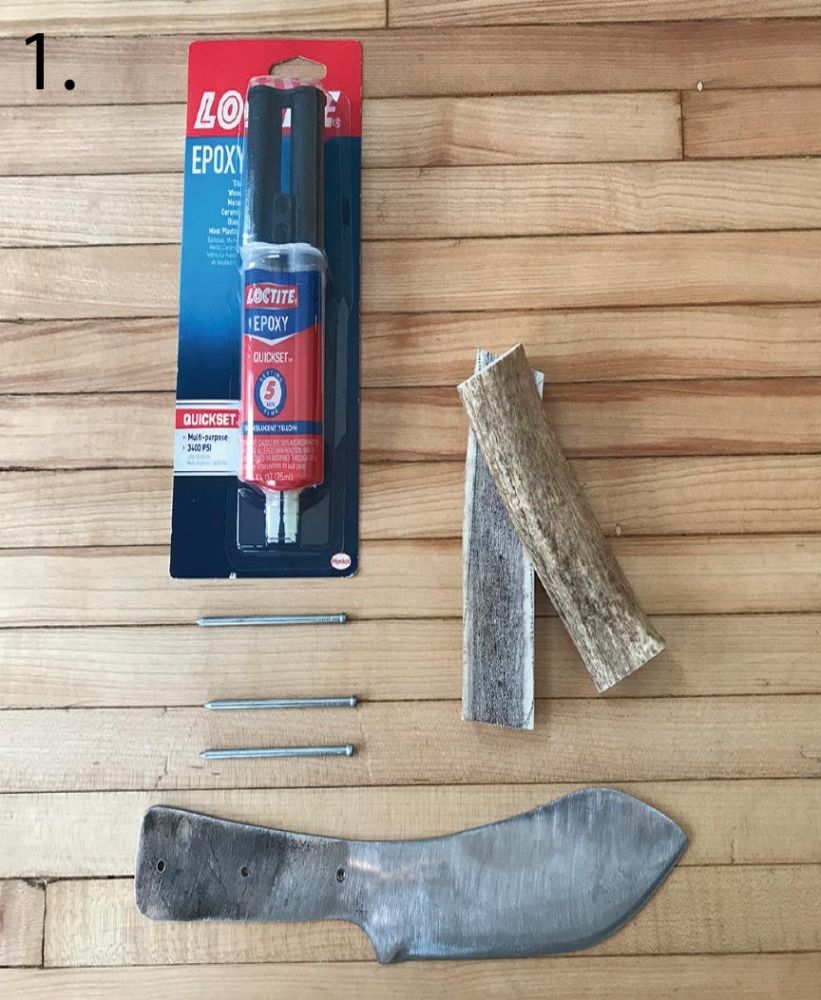
Making your own Nessmuk knife is relatively straightforward, even if you’ve never made a knife before. I started out on the internet by searching “Nessmuk knife patterns” and printed out a pattern that was traced onto a scrap of 3/32-inch 1060 steel.
If you’re lucky enough to have access to a plasma cutter, that will make things easier, but you also can use an angle grinder with a cutting wheel to rough out the shape, and then smooth things out with a paddle wheel. In addition to the blade blank, you’ll also need handle material (antler was traditional), epoxy adhesive, and handle pins (I used large aluminum finish nails). 1
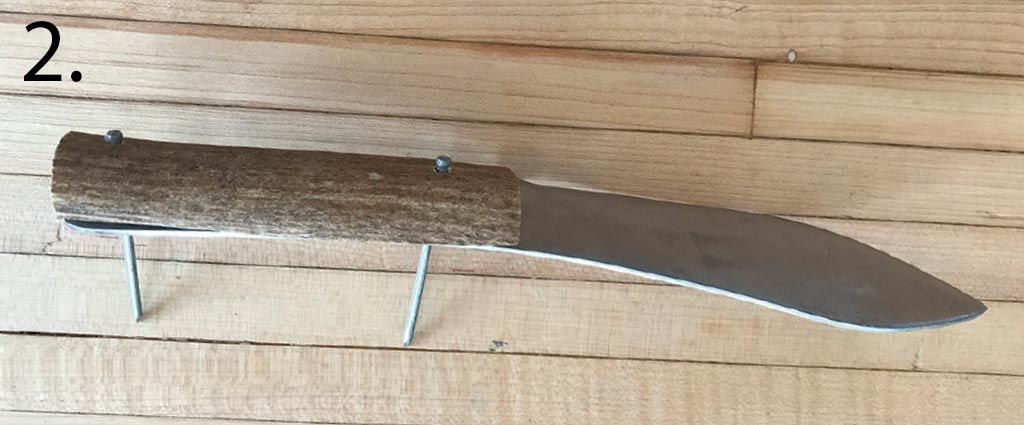
A band saw was used to carefully cut the elk antler handle in half. I then traced the pinholes from the blade blank to the inside of each handle half, and drilled the holes so that the pins fit snugly and squarely. 2

Once happy with the handle fit, I cut the handle pins down to size and applied epoxy to the inside of the handle material. The handle was then placed in a vice overnight to cure. 3
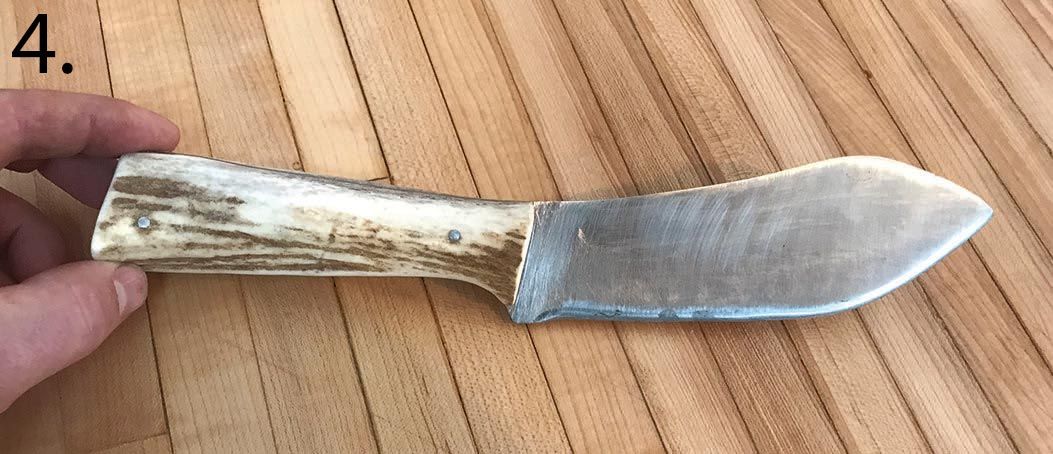
With the handle cured, a 220-grit flap wheel was used to smooth the contour of the handle. The edge of the knife was rough-sharpened with a file, then finished with a diamond stone. The result is a functional, ergonomic knife with interesting lineage, all for about $10 in materials and four hours of labor. 4