

Before free time was subjugated to the mighty X-Box and “reality” TV, entertainment often took the form of functional crafting. Those looking for a break from digital overload – or those who simply don’t do well with idle hands – might consider trying out some of these lost rural skills. Carving a simple wooden spoon is a good way for novices to get started; the process is outlined below. Just remember to take your time.
Select your materials: The material for carving a spoon may be as near as the hedgerow behind your house. If you live in a place where you don’t have access to greenwood, talk to your local department of public works or an arborist. For a basic kitchen spoon you’ll need straight, knot-free branch section that is about a foot long and three inches wide. Ideal species include basswood, birch, ash, and alder.
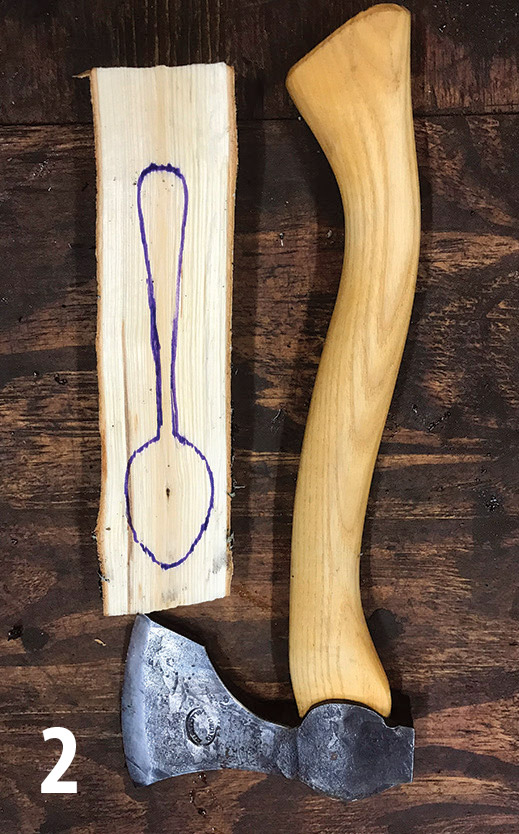
Split and trace your block: Use your axe to split the block of wood in half. (1) This will give you two blanks, so that if you mess up on your first spoon, you’ll get a second chance. Once the block is split, use the bit of the axe like a chisel to shave a smooth face on the blank. Now use a kitchen spoon that you already have as a pattern and trace it onto the smooth side of your spoon blank. (2)
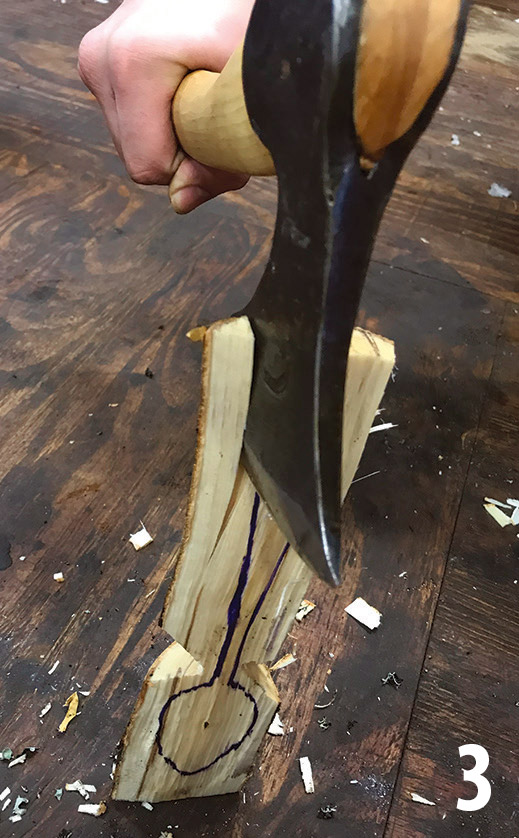
Chop your shoulder notches: On each side of the blank, chop a v-shaped notch to within one-quarter inch of your pattern line. You can now stand the spoon up and split wood on each side of the spoon handle. Be careful that your split line bisects the v-notch. If you go too far in, it will split the bowl of the spoon. (3)
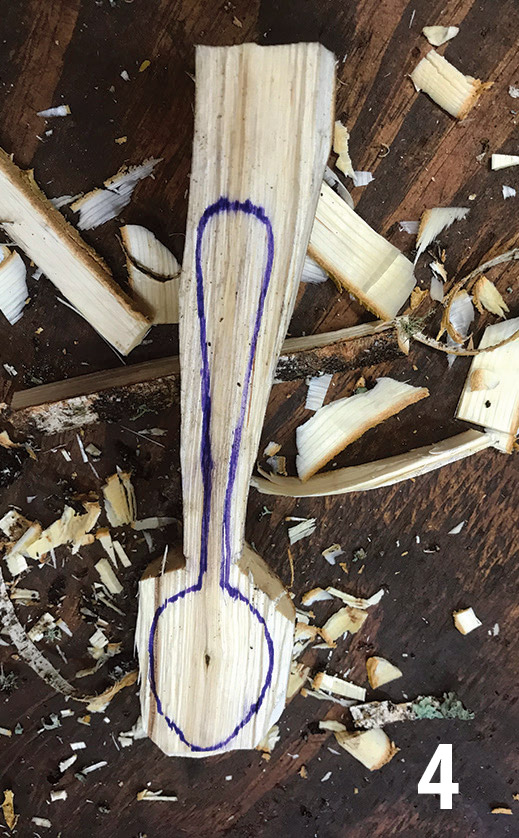
Rough out the spoon: Use your axe to shave closer and closer to your pattern line. On the backside of the spoon, begin rounding the bowl of the spoon. The last one-eighth inch of material can now be removed with a carving knife or sharp pocket knife. (4)
Carving the bowl: The most difficult part of carving a spoon is forming the bowl in a way that maintains even thickness. Special spoon carving knives with a hooked blade are available, but a straight-blade knife can also be used by placing the tip of the knife in the center of the bowl and rotating the blade.

Finishing the spoon: The mark of an experienced greenwood carver is the ability to carve a finished spoon with nothing more than an axe and knife. Sandpaper is seen as cheating, but for the non-purists it may be a means to an end that you’re willing to accept. Since most greenwood is about 40 percent water, you’ll want to allow your spoon to dry slowly to prevent cracking. A cool basement or wrapping the spoon in damp newspapers are time-tested techniques. Since you’ll presumably be using your spoon for cooking and eating, use a natural preservative such as sunflower oil instead of chemically based wood preservatives. (5)