Owning multiple chainsaws is a bit of an insurance policy. If a saw breaks, or gets pinched, having a backup saw (or two!) can keep you cutting. Last winter, I visited a friend who was frustrated by the fact that he had three chainsaws that all used different sprocket, bar, and chain configurations. This meant buying and lugging around different sharpening setups for each saw, which prevented the convenience of easily swapping bars and chains between the saws.
The three-chainsaw firewood fleet included 55cc, 62cc, and 92cc displacement saws. The smallest of the saws came stock with a .325 pitch chain, the medium saw sported a 3/8-inch chain, and the largest saw was outfitted with a .404-inch chain. While a professional sawyer may cite torque and efficiency advantages for running different setups on each saw, the casual firewood cutter will find the convenience of standardizing the fleet outweighs any minor performance advantage. Completing a sprocket and bar swap can reduce the number of tools and sizes of files you need to maintain your saws.
Before you begin tearing apart your chainsaws, you’ll want to determine if your saws can use the same chain. In the example above, the saws are all large enough to effectively use 3/8-inch pitch chains. If you have a 35cc saw and 100cc saw, the size difference is simply too great to use one size of chain. If you own smaller saws, in the range of 35cc to 50cc, you might opt for standardization using a .325 pitch chain. For exceptionally large saws (90cc and up), you may opt to standardize with a .404 chain. Most professional-grade chainsaw manufacturers offer a chart indicating which bars, chains, and sprockets can be interchanged. It is also worth noting that not all brands allow the same level of component versatility based on the clutch design and parts availability.
The actual conversion requires assembling three compatible components: sprocket, bar, and chain.
Sprocket: Attached to the crankshaft of the saw is the sprocket, which rides on a bearing and is usually held in place with a washer and C-clip (on chainsaws with inboard clutches). The sprocket will indicate the chain pitch that it’s designed for, as well as the number of teeth for the sprocket. (Photos 1 & 2)
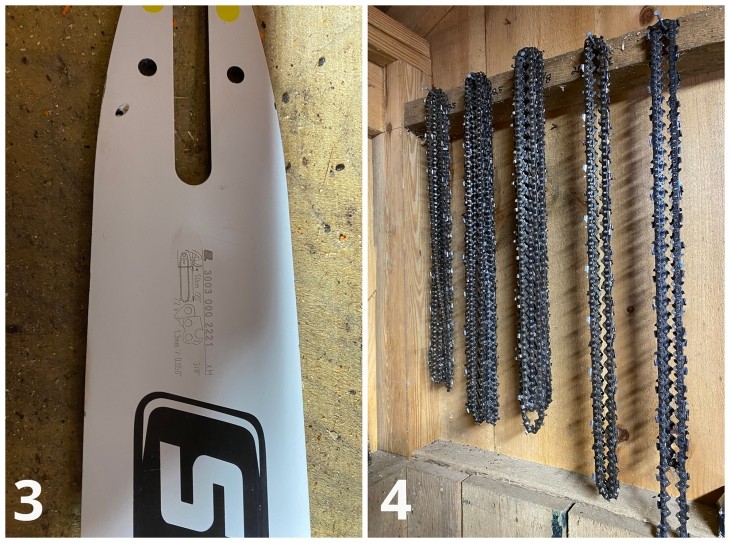
Guide Bar: The bar needs to be sized for the proper chain pitch and proper chain gauge. The gauge refers to the thickness of the drive link, which corresponds to the width of the guide bar groove. Most chainsaw bars have this information etched on the bar end closest to the motorhead. (Photo 3)
Saw Chain: The chain must match both the sprocket pitch and the bar pitch and gauge. If you’re consistently cutting the same size wood, you may opt to outfit all your saws with the same size bar and chain to further standardize your setup. (Photo 4)
With your conversion complete, you no longer need to wonder if you grabbed the correct sharpening file. You can now swap out a guide bar in the field, and no longer have to worry whether you’ve matched a narrow gauge chain on a wide gauge bar. Beyond the basic standardization upgrades mentioned here, there are additional hacks, such as increasing or decreasing the sprocket size, using a different tooth pattern, or altering raker height, which I plan to cover in future columns.


