Skip to Navigation Skip to Content
Decorative woodsy background

Balsam, Bunches, and Bows: How to Make a Wreath

Balsam, Bunches, and Bows: How to Make a Wreath
Photographs by Adam Frehm

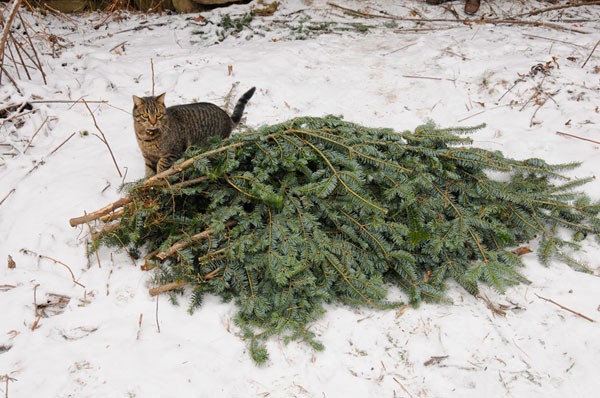
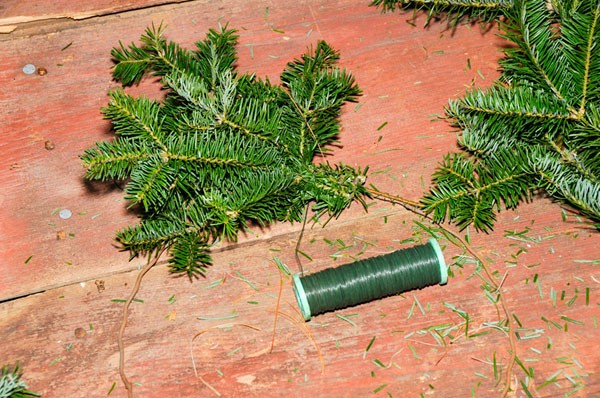
On a raw December day in northern Vermont, with a nor’easter bearing down on New England, the kitchen in Sarah Taparauskas’s circa 1850s farmhouse is a warm, inviting place to spend an afternoon. A fire blazes in the woodstove, and the scent of freshly cut balsam fills the space.

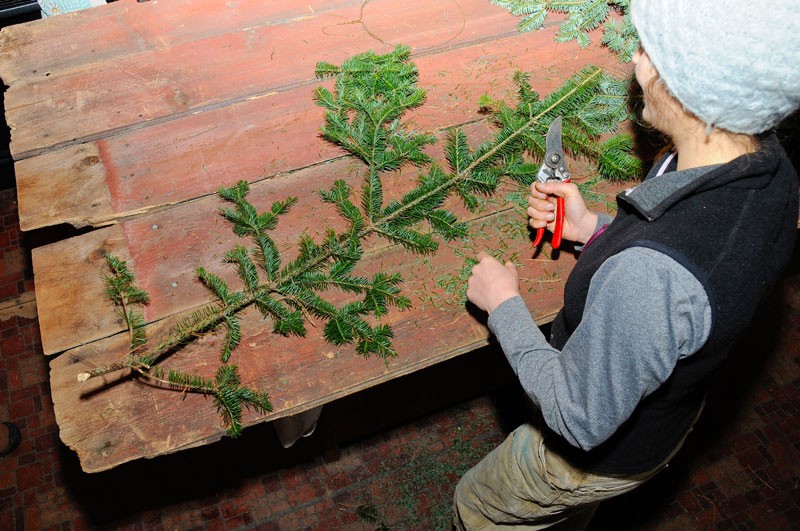
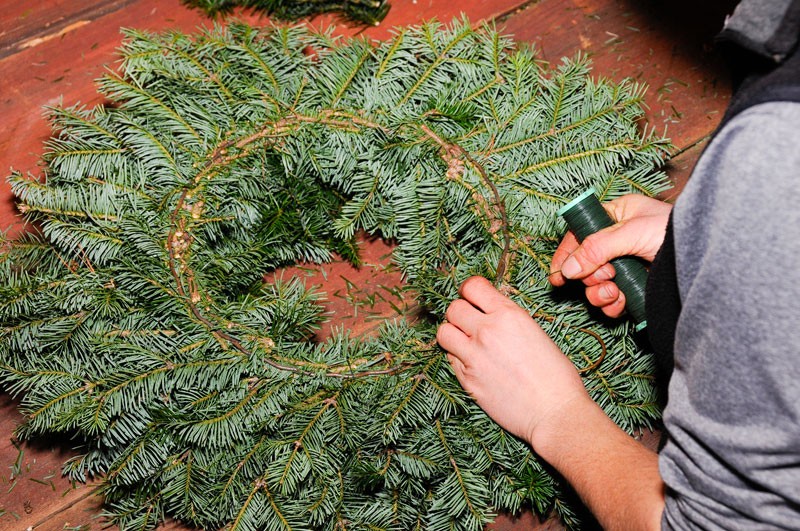
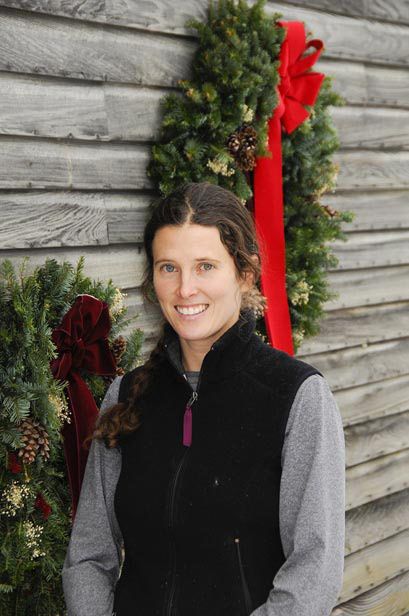
Dressed in a grey woolen hat and worn Carhartt pants, her hands stained black with balsam pitch, Taparauskas is the perfect picture of a Vermont-born and -raised craftsman. She began making wreaths 13 winters ago, as a side job in college, under the tutelage of Steve Chamberlain of Castleton, Vermont.

Chamberlain decided to bow out of the wreath-making business in 2001 and sold his supplies to Taparauskas after her three years of apprenticeship. Since then, she has made 150 to 200 per season – more than 1,200 wreaths.

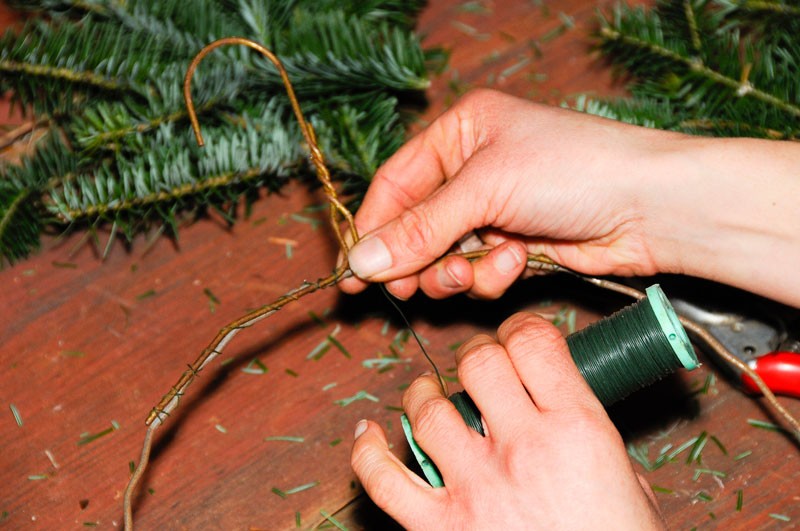
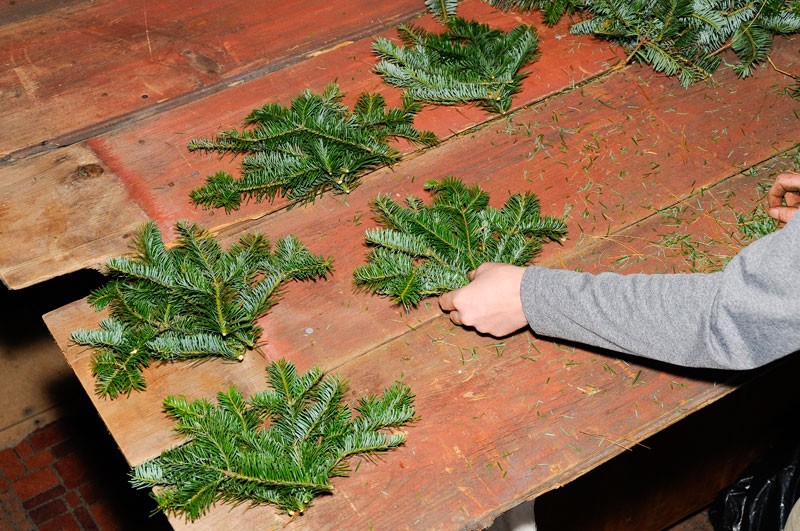
For complete wreath making instructions, please see the photo gallery at the end of this article posting. A hard copy of the Winter 2009 Northern Woodlands magazine with this article feature may be purchased for $6 by ordering online or by contacting the office at 800-290-5232.

PRUNING BALSAMS FOR ANNUAL WREATHS

Balsam fir is ubiquitous throughout the northern New England landscape; in fact, there are more than 5.3 million acres of spruce-fir timberland in Maine alone. There, you could make a hundred wreaths a year for the next thousand years and you’ll not put a dent in the supply.

It’s a different story in more southern areas, however, where balsam fir is sparse. To maximize the natural resource upon which the trade depends, a wreath maker may need to think ahead. With some planning and a modest investment, small groups of trees can be managed for a continuous supply of balsam tips.
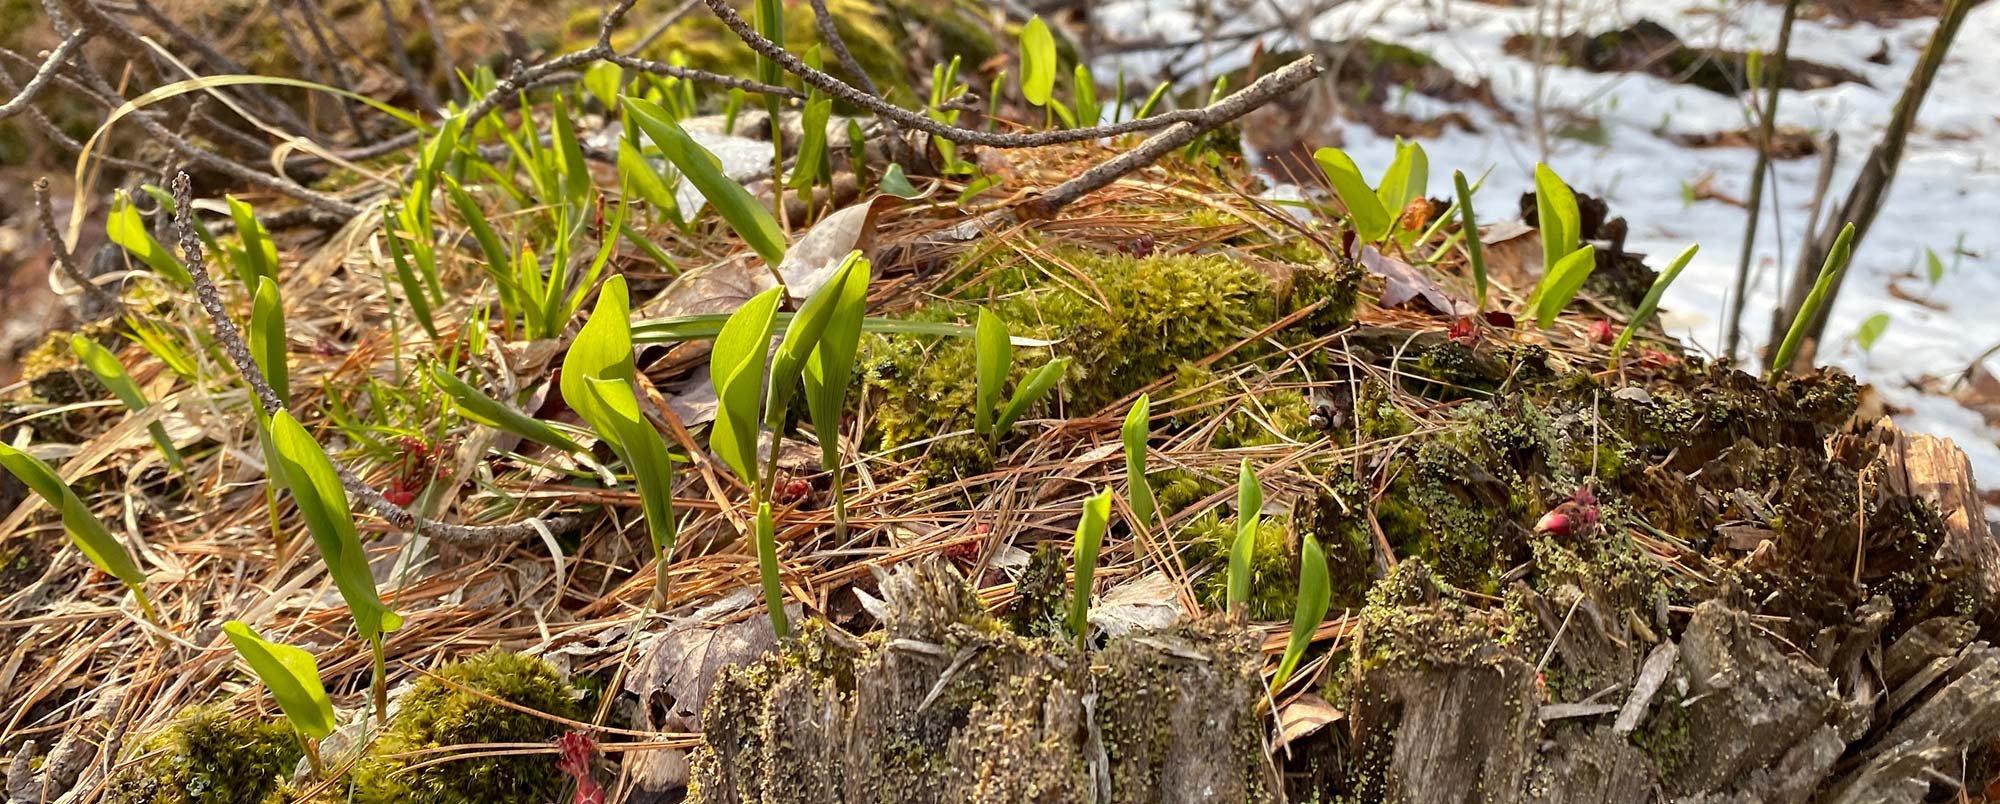
Find the right spot
When searching for the perfect wreath-production area, you’ll want to find a healthy stand of balsam firs that are all about 10 to 15 feet tall. The fewer “intruders” (other tree species), the better.

Weed the area
Just as you would weed a vegetable or flower garden, you need to weed your fir stand to ensure that each tree gets plenty of sunlight. Remove any trees of other species that are growing between the balsams or are covering up any portion of the balsams’ branches.

A healthy tree produces healthy tips, so thin the remaining firs so that they are spaced 8 to 10 feet apart, ensuring that they receive adequate sunlight on all sides. When trying to decide which trees to thin, look for some telltale signs that a tree is no longer thriving, including muted color, insect damage, or disease.

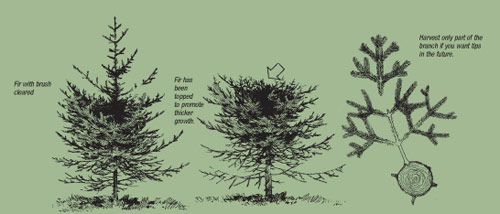
When managing for balsam tips, it’s often a good idea to lop the top of the tree off and trim the new leaders each year. Not only will the branches of a shorter tree be easier to harvest, but they’ll also be thicker, as the tree devotes energy to its branches, not its height. Also, the middle branches of a tree provide fuller, more rounded tips than do the top and bottom sections of a tree.

Trim carefully
The needles of the balsam fir produce the food that the tree needs to survive. In order for the tree to fully recover before the next harvest, gather needles from only one-third of the tree. It’s also a good idea to set up a three-year harvest cycle, which gives a tree two years off before you prune it again.

Harvest at the right time
If you harvest balsam branches too early in the autumn, you’ll run the risk of your wreath shedding its needles before the holidays. Only harvest balsam branches after the needles have hardened, or “set.” This typically happens when the temperature has been below 40°F for at least 20 days in a row, or after three or more consecutive 20°F nights, typically sometime in November. —Amanda Kuhnert


Illustrations by Mark A. McCullough and reproduced with permission from “Growing a Continuous Supply of Balsam Fir Wreath Brush,” bulletin #7089, University of Maine Cooperative Extension, Orono, Maine. http://www.umext.maine.edu


How To Make A Wreath Gallery

1 FIND YOUR BRANCHES Every year, around Veteran’s Day, Taparauskas starts the annual wreath-making season by loading up her borrowed truck with a chainsaw, twine, and clippers and heading to a friend’s overgrown Christmas tree farm, where she collects her balsam branches. This is no small feat for a woman who can’t weigh much more than 110 pounds. She hunts for balsams that are 5 to 8 inches in diameter; then she cuts the tree down and shears off all the branches. (Editor’s note: Balsam trees can be pruned for a continuous supply of tips; see story on page 49.) Although cedar and white pine are also viable options for wreath-making, Taparauskas prefers the softer needles and the aroma of balsam. She mentions that some wreath-makers like to mix in a little spruce for its slightly rougher texture, but she’s a balsam purist. Balsam fir is common throughout the northern tier of the Northern Woodlands readership area but can be hard to find in more southern locales. Those of us without a backyard full of balsam or the luxury of an overgrown tree farm at our disposal can buy bundles of balsam from a local florist or pick up discarded branches at a Christmas tree farm or stand. “After I cut the branches off the tree, I make them into bundles, with 20 to 30 branches per bundle, weighing in at around 30 to 40 pounds,” Taparauskas says. Each bundle will produce about 10 wreaths. Once she returns home to Colchester, she stores her bundles in a cool place. “Everything always stays outside on the north end of the barn, where it’s shadier and colder,” she says.
2 CLIP THE BRANCHES When Taparauskas is just a day or so away from assembling her wreaths, she begins the laborious process of clipping the branches, accumulating as many of the favored fuller tips of the balsam branches as she can. The length of the pieces depends upon the intended size of the completed wreath. For a 10-inch wreath, she will cut pieces that are approximately 8 inches long. She cuts 6- to 7-inch-long pieces for an 8-inch wreath, her smallest size, and 10-inch-long pieces for an 18-inch wreath.
3 PUT A "TWIST" ON THE TRADITIONAL WREATH RING A wreath is measured by its inner diameter or the size of the ring used to make it. What’s sold as a 10-inch wreath, on a 10-inch ring, has an outer diameter of 20 inches. Taparauskas buys her rings from Green Mountain Forest Supply or The Vermont Wreath Company, and then she adds her own inventive twist by cutting off the top of a clothes hanger and wiring it to the ring for a ready-made hanger.
4 ASSEMBLE SMALLER BUNDLES Next, Taparauskas takes her pile of pieces and begins to organize them into small bundles consisting of four or five pieces each, creating “fans” that are approximately 6 inches wide. She makes her fans by placing two or three choice pieces (the soft, needly pieces at the very tips of the twigs) in front, with woody pieces (the more twiggy pieces that originate closer to the branch) in back. At the end of this stage in the wreath-making process, Taparauskas’s table is covered with rows of beautiful little evergreen fans. It takes about 20 bundles to make a 10-inch wreath.
5 ATTACH THE BUNDLES Taparauskas’s wreaths are notable for their lovely, crisp form. They are also extraordinarily full. What’s her trick? It’s a combination of maximizing the number of bundles used per wreath and the art of tying the bundles to the ring. She uses 24-gauge wire, which can be bought at any floral supply company or craft shop, and a pair of clippers. She begins by tying the wire to the top of the ring next to the hanger. The critical step here is to hold the bundle tightly as you attach it to the ring. While pressing the base of the bundle to the ring with one hand, wrap the wire tightly around the base (about 1/4 to 1/3 of the way up the bunch, or about 1 to 2 inches from the stem end of the pieces, depending upon their length) of the bundle and the ring. Wrap the wire around once, then pull tight, wrap again and pull tight, and then maybe finish off with one last wrap. The first bundle is tied onto the ring at a 30° angle (see photograph). The placement of each successive bundle is critical to making a fuller wreath. The next bundle should cover about half of the first bundle and be wrapped tightly again in the same manner. If the bundles are placed too far apart, you will end up with a deflated-looking wreath. Another important thing to remember as you add bundles is to place each one at the exact same angle as the previous bundle. “The branches above should parallel the branches below,” Taparauskas says. Resist the urge to angle the bundles so that they follow the curve of the ring. She moves clockwise around the ring. “I rotate the ring as I go so that I’m always working in the same position – between twelve o’clock and two o’clock,” she says.
6 CRAM IN THE LAST BUNDLE “Just when you think you can’t fit in another bundle on the ring, stick another one or two in,” she says. When she finally reaches the last bundle, she wraps the wire firmly around it at least three times, and then she flips the wreath over and wraps the wire around the coathanger handle five to six times. As a final touch, Taparauskas may clip a few twigs that are sticking out to make a nice symmetrical center.
7 DECORATE YOUR WREATH Taparauskas likes to collect cones from red or white pines, since they’re larger than balsam cones, which are only one to three inches long. The red pine cones are small when they first fall from the tree (1½ to 2½ inches long), but they develop a nice round shape when they open. She gathers cones while hiking in the fall. “The cones are closed when you get them,” she says. “But if you let them sit under the woodstove for a few days, they’ll open up.” Taparauskas makes her own bows, having learned the art of bow-making from friends who had worked in floral shops. She also grows and dries her own flowers, such as German statice, globe amaranth, rosehip, and winterberry, and then stores them in the barn until the arrival of the next wreath-making season.

No discussion as of yet.

Leave a reply

To ensure a respectful dialogue, please refrain from posting content that is unlawful, harassing, discriminatory, libelous, obscene, or inflammatory. Northern Woodlands assumes no responsibility or liability arising from forum postings and reserves the right to edit all postings. Thanks for joining the discussion.