
Using a bucking stanchion not only keeps the wood off the ground (and your chainsaw out of the dirt) but also allows you to cut multiple logs or slabs at once. The design I use is sized so that my chainsaw bar is long enough to cut through the entire rick of wood without switching sides. With a sharp saw, it takes less than 10 minutes to buck an entire cord of wood.
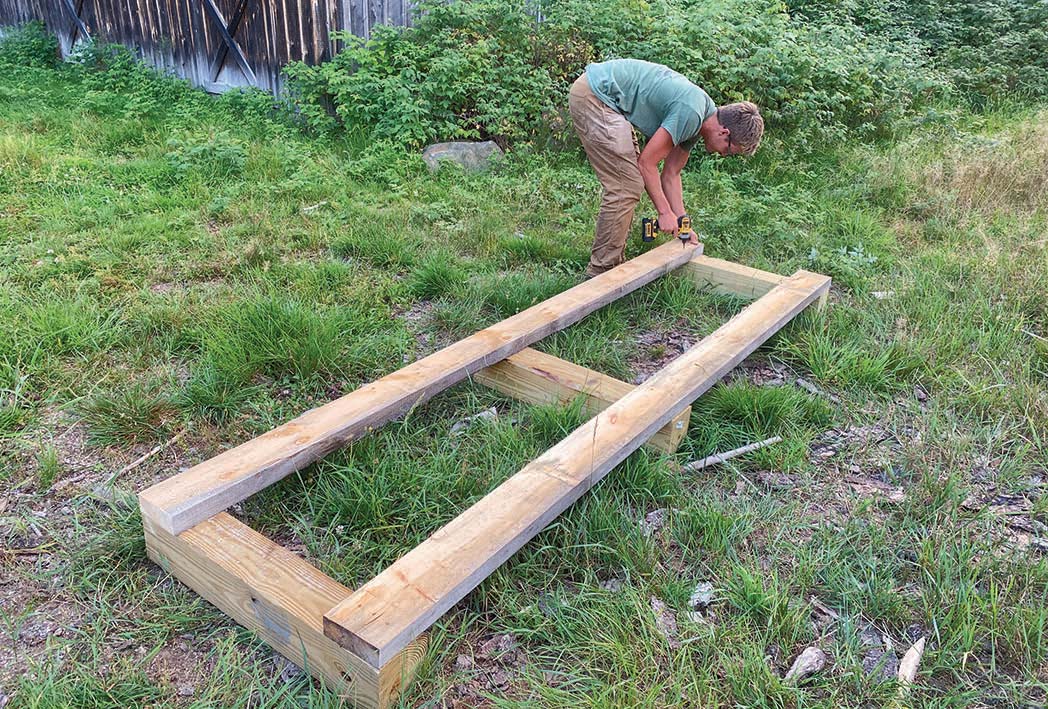
Building the stanchion starts by laying out bunk timbers. I had some 6-inch-by-6-inch timbers left over from a pole barn project that I was able to repurpose by screwing two 2-inch-by-6-inch skids along the bottom of the bunk timbers.
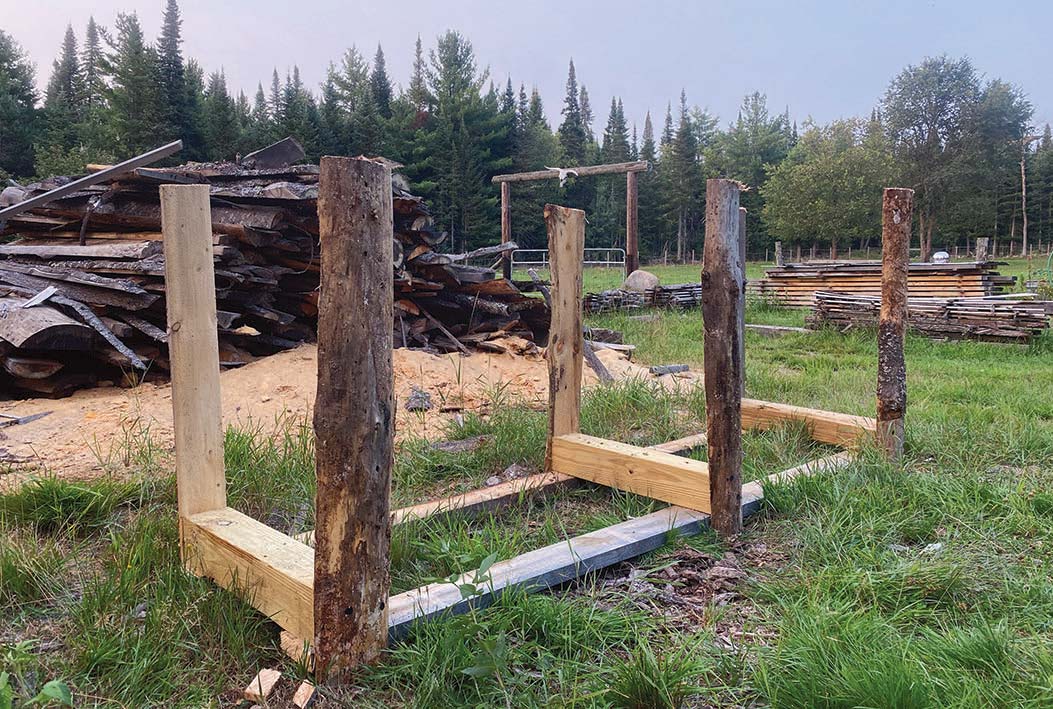
With the skids in place, flip over the base of the stanchion. Vertical uprights can be made from 2-by-6s or slab wood. Attach the uprights to the bunk timbers using a timber lag screw. Three screws per upright are sufficient.
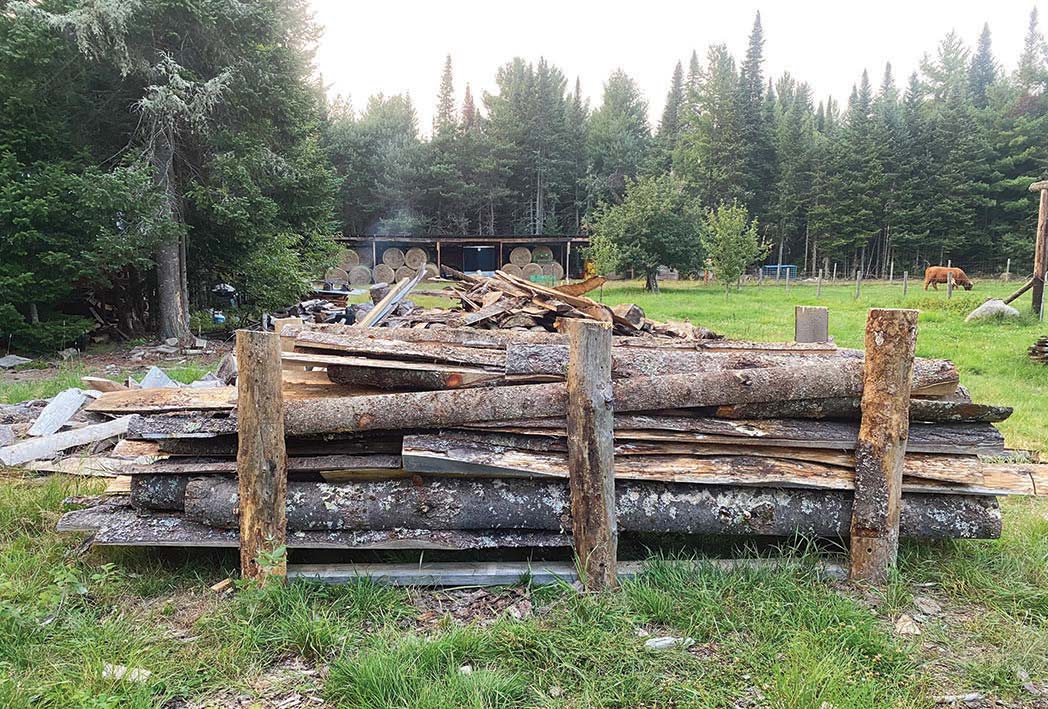
Load the stanchion with poles (small logs) or sawmill slabs and you’re ready to begin bucking with your chainsaw. Note that in this design there are only three bunk timbers. A variation on this design includes using more bunk timbers and uprights so that the uprights become cutting marks that create custom-sized firewood. The downside to having additional uprights is that it makes the cut wood harder to remove from the stanchion.
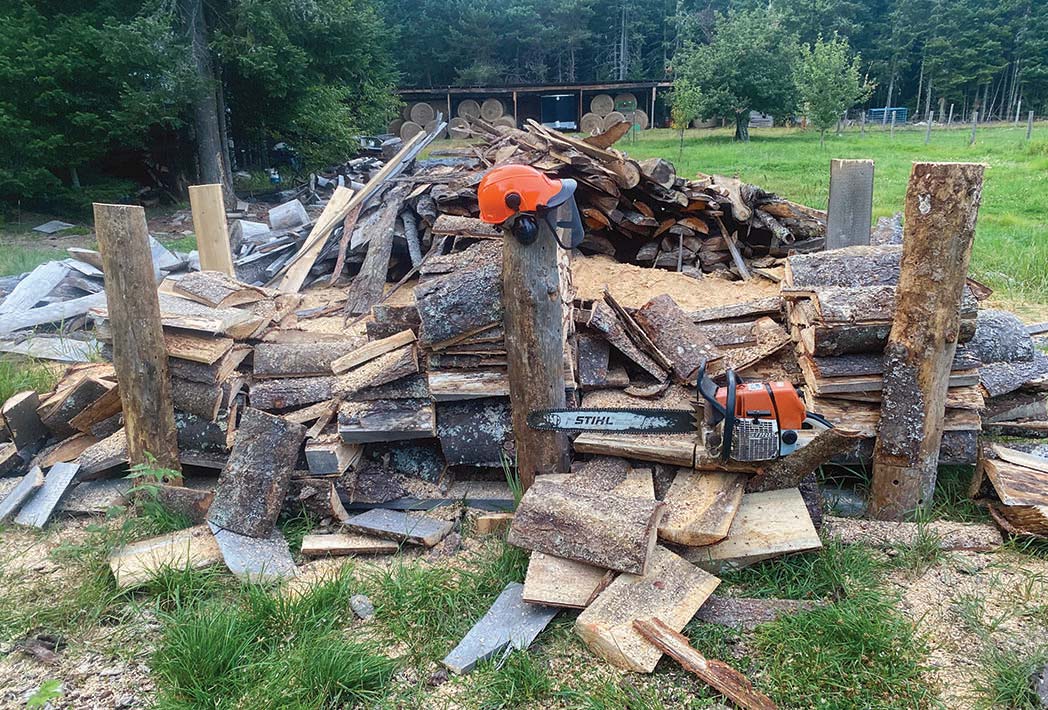
Once the wood is bucked, you’ll be left with evenly sized firewood that you’ve processed in a fraction of the time as cutting each pole or slab individually.