Skip to Navigation Skip to Content
Decorative woodsy background

Make Your Own Axe Handle

axe3.jpg
Photos by Diane Morgan.

Henry David Thoreau admired a hand-made axe handle in a journal entry made more than 150 years ago: “Those made by hand are considered stronger than those which are turned (on a machine), because the outline conforms to the grain . . . I like to see the farmer whittling his own axe helve as I did E. Hosmer, a white oak on the 27th.”

Times have changed, but Thoreau’s sentiment is as true today as it was back then. When it comes time to replace the handle on your axe, why not forgo the trip to the hardware store and whittle one yourself? You needn’t be a distant relative of E. Hosmer to accomplish such a feat. All you need is an axe, a drawknife, a spoke shave, a rasp, and a sharp knife with a flat bevel. Here are some instructions to get you started.

Step One

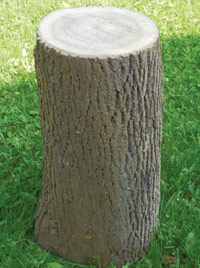
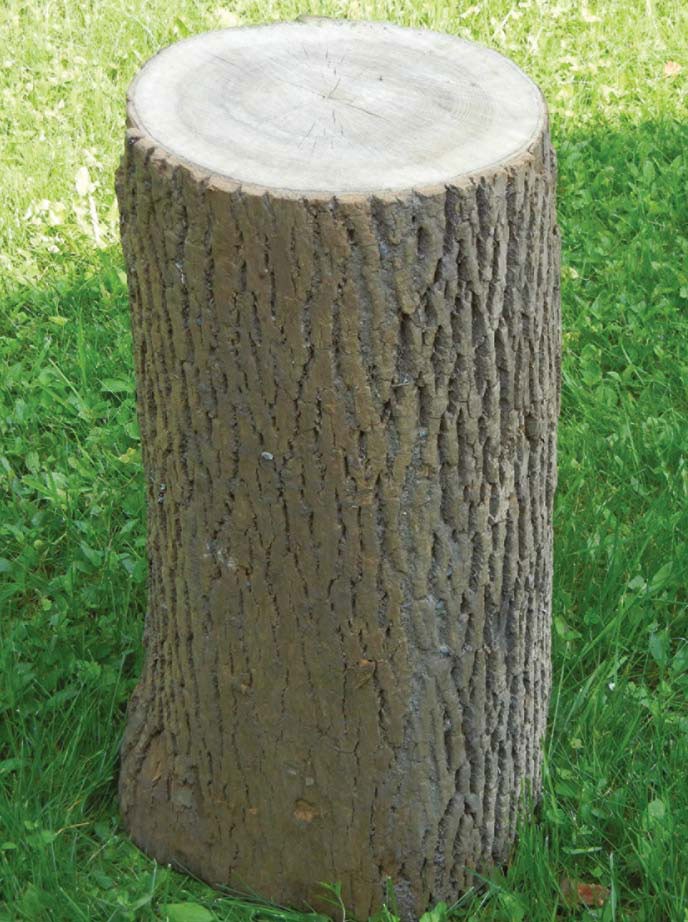
Choose a freshly cut bolt of ash, hickory, sugar maple, yellow birch, or hophornbeam. A firewood cutter would be a good source. The wood should be green and straight-grained, without knots, about 10 to 16 inches in diameter. It is surprising how easily green wood can be shaped with sharp hand tools; it’s like cutting frozen cream cheese.

Step Two

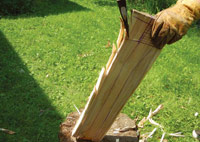
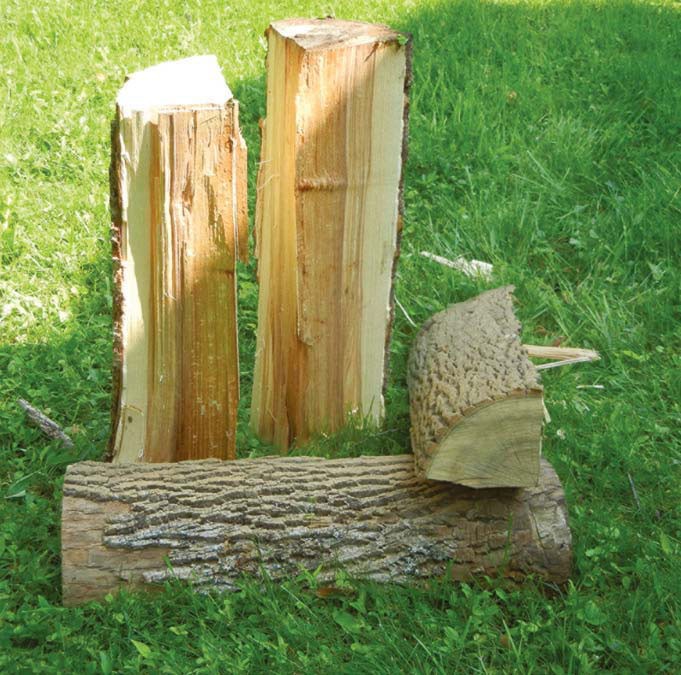
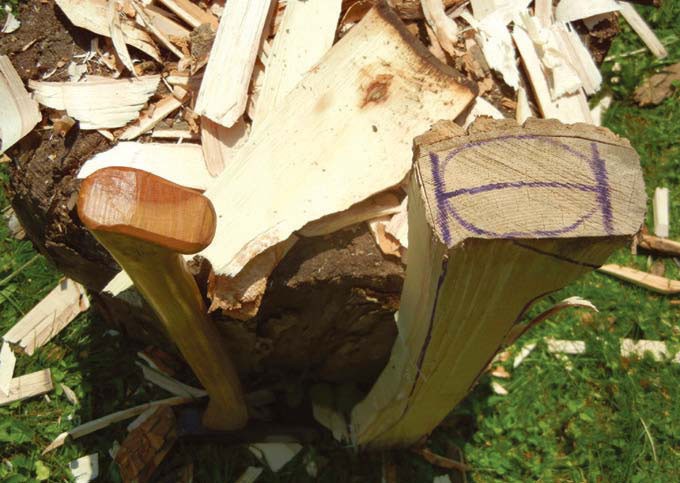
Split the bolt into quarters, sixths, or eighths; each split piece, called a billet, should have at least four or five inches of bark. The one guiding principle to keep in mind when making an axe handle is to keep the same annual growth ring in the center of the entire handle, from where it will enter the axe head to the fawn’s foot. That annual ring will be split by the wedge in the final step, and it will run in the same plane as the swing of the axe, providing the handle with strength and shock-absorption. All the splitting, hewing, shaving, and carving are done to provide an appropriately sized handle while holding to this principle.


Step Three

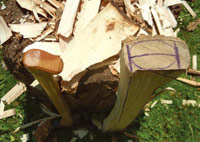
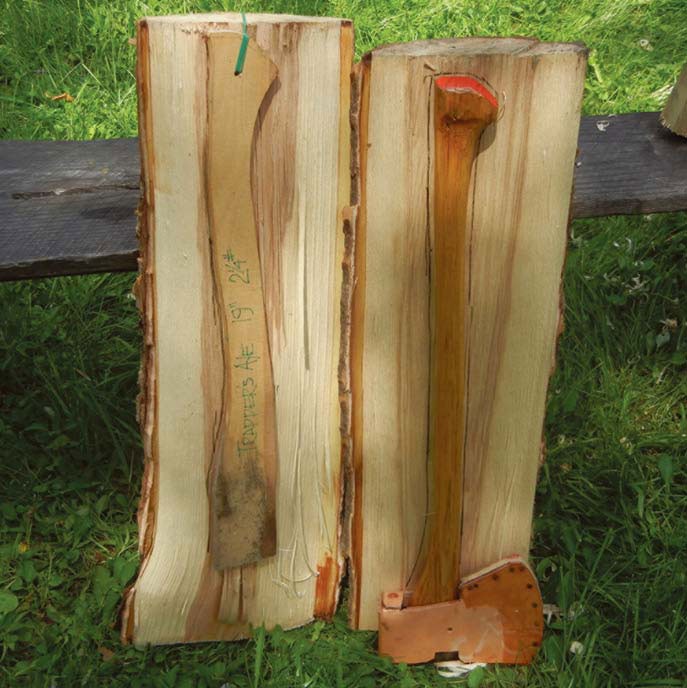
Score and hew, or split out, the triangle on the inside of the billet and remove the bark. Hew the surface smooth and trace on it an outline of the desired handle. The billet should be about one and one-half inches thick, oversized at the bottom for the fawn’s foot, and about four inches wide. The length of the handle varies with use. Handles used for shaping work are 19 to 22 inches, camp axes carried on trips are 20 to 26 inches, and those for chopping and splitting are 28 to 31 inches. A chopping axe handle length is often equal to the inseam of your pants.

Step Four

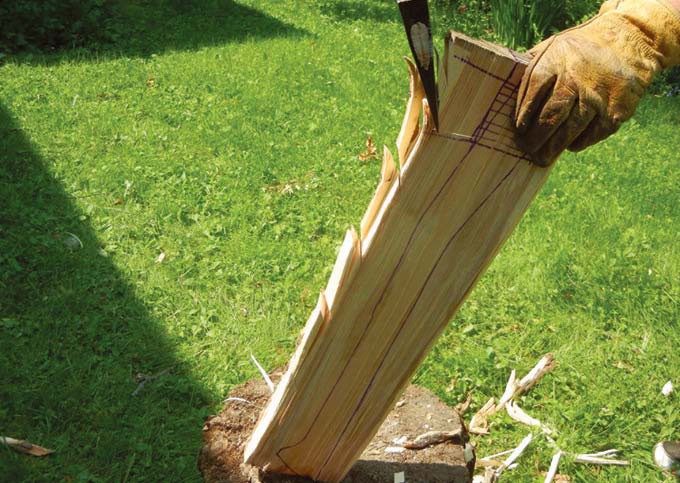
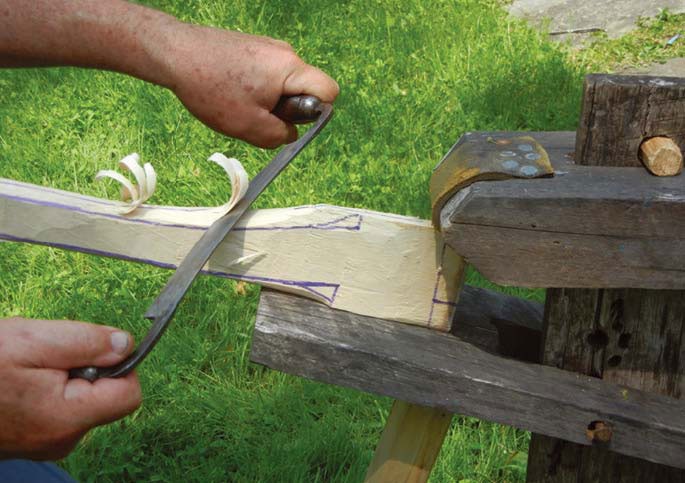
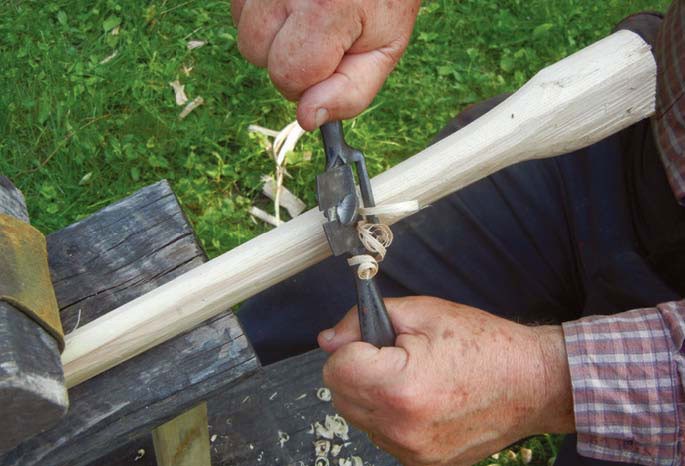
Following the pattern, score and hew the handle into rough shape. The outline and the center lines on the annual ring may have to be redrawn as the draw knife and spoke shave remove more wood. A shaving horse is useful, but a bench vice will work well, too. The area of the handle that fits into the eye of the axe head is kept as an oversized rectangle of wood; the shaft is shaped into an oblong profile that has the ratio of one to two, thickness to width. This keeps the handle from turning in your hands during use. Many of the handles we have are ¾ inch thick and 1½ inches wide. The fawn’s foot can be shaped with a spoke shave or rasp, but a sharp knife works best when the wood is green.


Step Five

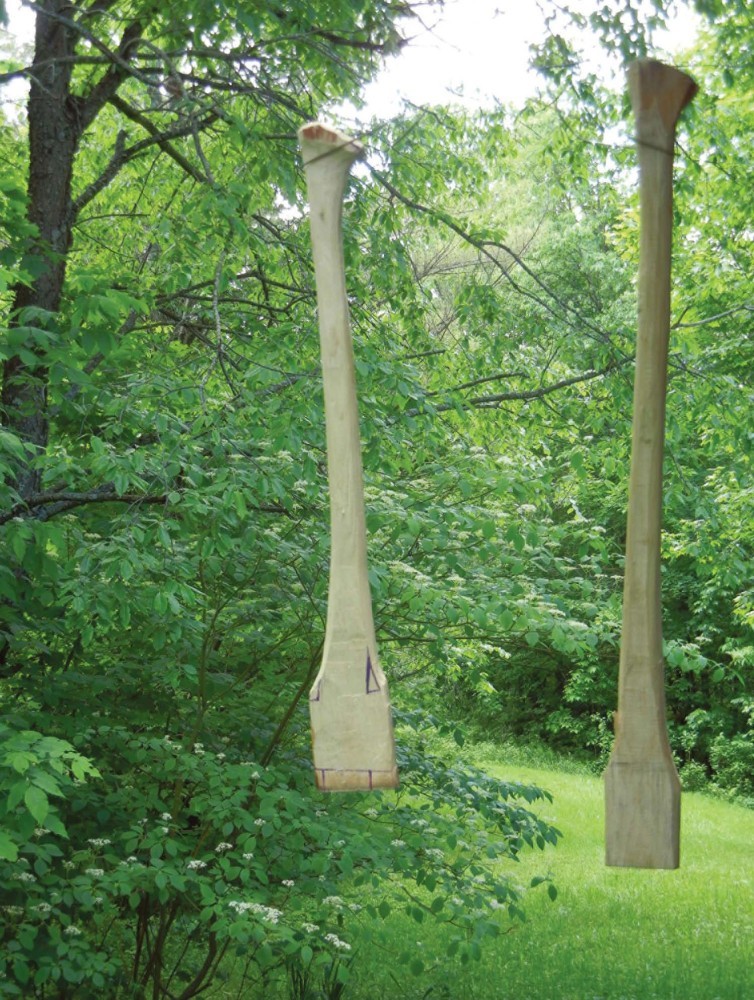
The handle is nearly finished now, but it should be dried for a few weeks. Seal both ends to keep them from drying faster than the rest of the wood and checking. A cheap way to do this is to mix equal amounts of white glue and hot water, then smear the paste on the end grain. Then, hang it up and let it dry. When dry, the handle can be further finished by sanding, scraping with a piece of broken glass, or smoothing with a spokeshave. Finally, treat it with a couple of coats of boiled linseed oil, thinned with turpentine.


Last Step

The last step is to hang the axe head on the dried handle. A straight-grain wooden wedge is used to keep the joint tight and safe. The slot for the wedge is either sawed or split along the center annual ring, to half the depth of the eye. Sawing provides more control, but splitting can work well if the wood is clamped tightly to limit the depth of the split. Great care in shaping the wood for a tight fit is essential. Take a little at a time with your spokeshave or rasp, and keep checking the fit until you have it right. Tapping the squared-off part of the fawn’s foot should pull the axe head onto the handle.


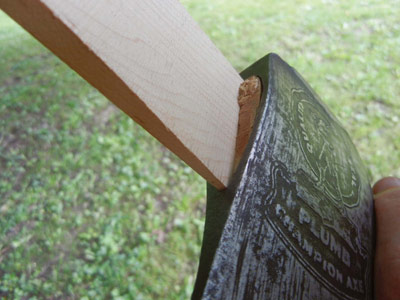
The wedge can be sawed out on a band saw, and should be an inch or more longer than needed; it should be as wide as the slot, and thicker. Insert the wedge and drive it in until tight, then wait a few days and pound it in more. With the wooden wedge in place, apply a wood-swelling fluid such as Chair-Loc or Wonderlok’Em Tite Chairs, available at most hardware stores. This product will swell the wood, then solidify inside it, assuring a tight fit. Here at home, we have handmade axe handles that we’ve used every year for over thirty years; they are as good as the day they were fitted to the head.

axe handle Gallery

| Photo: Diane Morgan
| Photo: Diane Morgan
| Photo: Diane Morgan
| Photo: Diane Morgan
| Photo: Diane Morgan
| Photo: Diane Morgan
| Photo: Diane Morgan
| Photo: Diane Morgan
| Photo: Diane Morgan

Discussion *

Dec 27, 2022

Someone here recommended using boiled linseed oil “only” because normal, raw linseed oil doesn’t cure. Pretty obvious they haven’t tried it. It cures fine and doesn’t get gummy at all.

Boiled linseed oil has drying agents and lead in it. You really shouldn’t put it on anything you plan on touching often, and never apply it without PPE.

When using raw linseed oil you’re talking about waiting an extra day for it to dry. To avoid exposing my family and myself to lead, I’d say it’s worth it. I really can’t afford to get any dumber. So no BLO for us.

Not Bill
Jul 17, 2021

Good information here. I’m going to try and rough shape a few handles from some green mulberry.  The stuff stays wet forever and I don’t have 2 yrs to dry each blank. So, I’m hoping this method proves useful.  I’m a little worried about warp and twist, so I may modify just a bit and cut larger, rougher staves or blanks. That way if they twist over the next couple weeks, I can somewhat compensate for it. Thanks so much for the detailed info that you’ve made work for you. 

- John

John Whiteker
Jul 23, 2020

I noticed no one specified Boiled Linseed Oil. You have to use it because raw linseed oil will never cure. BLO will seal the end grain as well as the handle. Doing as earlier said put it on heavy the first time to let it soak into the wood then wiping off the excess, and let it cure over night or even a full 24 hours, then daily for 4 or 5 days add thin coats while sanding with fine grit paper lightly wiping the wood down to get rid of the sanding dust, then adding a thin coating, I normally apply it a little at a time and then spreading with my bare hands and rubbing into the wood, rubbing hard enough to make your hands warm, if you do this well there really won’t be much or any oil to wipe off, go ahead and wipe it if you can see wet patches. BLO never completely dries and will continue to penetrate the wood!
What I’ve described is how I’ve finished rifle stocks. But I usually apply from a minimum of 8 coats and for a really great finish up to 16 or more. The hand rubbing is the trick. For hand tools you can add coat of oil every year to keep it in best condition.
I hope I’ve helped,
Bill

Bill
Dec 28, 2019

The cracking from drying can be prevented by simply soaking even just one end of green cut wood in saturated salt water for a few days. The salt is transported into all water spaces in the wood including between wood cells as well as inside the cells (by osmosis) such that when the wood dries the salt crystals are left behind and the wood prevented from shrinking and cracking. The Finns have used this method for centuries for making everything from tools to table ware.

Norman
Mar 09, 2017

Hi Tom,

I have made one handle of cherry and it was beautiful, but broke shortly thereafter.  I have never made one of black walnut, but just finished two spoons of walnut, a branch of a planted tree a long way from its natural range. A wonderful wood with hand tools.

To find more about the wood characteristics of black walnut, I would suggest that you make a search for a chart of wood engineering measurements or specifications, and the two to pay attention to are Modulus of Elasticty and Modulus of Rupture.  These measurements, expressed in comparative numbers will allow you to compare walnut to the real gems in axe handle woods: white ash, hickory and maple, and other woods.  In this small space it is difficult to copy the charts, but I just looked them up and Black Walnut is less elastic and less strong, in resisting breakage, but not by much.  I would give it a try with walnut; it is a wonderful wood to work with, and local to your area.  Go for getting perfect grain as that is a major consideration, and let me know how it turns out.

Thanks for asking, Ross

Ross Morgan
Mar 08, 2017

What are your thoughts on using Black Walnut for the handle? Or possibly Wild Cherry?

Tom Thomas
Feb 28, 2016

Ian in California,

I use a real thinned down mix of about 50-50 for the first coat of oil to turpentine; let it soak into the surfaces of wood in the axe eye and wedge.  Subsequent coats are thinned much less, maybe 5 to20 percent thinner, or none at all on a hot day. 

With less thinning, let the oil stay on the wood, but wipe off excess after about 20 minutes.  This way you get good drying and the finish is hard, not “gummy”. 

Many coats are good, then as needed over the years.

Ross Morgan

Ross Morgan
Oct 28, 2015

Very good article Ross. I never thought of carving it green. Much better than trying to keep logs and splits from checking.  It’ll certainly save on anchor seal.

Which is what I use to paint the ends, BTW.

Mobius Wolf
Aug 03, 2015

What ratio of linseed oil/turpentine do you use?

Ian
May 12, 2015

Hi everyone,
This is Ross, I wrote the article, and found out there were responses, sorry to be so late.  Thank you for the comments, some answers follow:

Ryan. I store many handles by suspending them from a rafter with a string and a nail or hook in the end out of sun, cool if possible.  If they warp, burn ‘em.

Mr. Ball, Yes, it is the first, you want to have a larger piece of wood as the piece of wood you take will have “flatter grain” less arc this way. 8 inch diameter is minimum.

John Santi, checking or cracking centers on the pith or center of limb. Split out center and use sides of limb. Sluicebox uses vaseline, and I often use white glue, thinned with hot water on ends.

Adam, if that is all you have, use it, but might be better looking for larger wood, a firewood cutter or logging contractor might help.  On a 3 inch diameter you have to split the center out to keep it from checking, and then cut the bark off, and the rings will have a short arc, all problematic on a 3 inch sapling for an axe handle.  Time spent looking for good materials is not wasted; time spent trying to make something of quality out of small trees and branches may be a waste of time.

Good luck with axe handles and thanks for you comments.
Ross Morgan

Ross Morgan
Apr 04, 2015

Hi, I’m looking to make my first axe handle. I was able to hunt down a ~35″ circular log of hickory that is about 3″ in diameter. If I whittle this to the desired shape will it work? Everything I’ve seen starts with an already split piece of wood (as done in this post). I’m mainly concerned with the strength of the handle.

Thanks.

Adam
Mar 13, 2015

I have found that rubbing vaseline into the end cuts prevents checking and cracking in green handles. Hope this helps. Do this shortly after cutting to length, before the wood begins to dry.

Sluicebox
Mar 10, 2015

I made a hammer handle from an oak limb I cut down from my tree that same day. It was beautiful. because it was green it shaped up so easily. Not bad for my first try. Was difficult to sand though, so I set it out overnight and by morning there was a huge check from stem to stern. What can I do to prevent this checking in the future? The handle was cut from a piece of wood about 2” thicker all the way around. Help I spent so much time on it.

John Santi Sr.
Oct 29, 2014

Never ever use the heart of the wood for handles!

Ranger
Sep 24, 2014

Just made a handle in 2 hours. Very useful. Never thought bout the center ring before. Made handles before but they usually break and are oddly shaped.

Rayquan
Aug 04, 2014

I think I get it, but in step two you comment about keeping the same annular ring in the center of the handle….

But, you’ve split the bolt into equal halves and quarters, yes?  So either you will just have a portion of the ring in your axe head, OR you’ll split the bolt off center so that you have the whole ring….

I’m guess it’s the first guess - You want as much of a portion of the ring as you can get…..

For most of us without milling equipment, there’s a limit to how big a bolt we can use, therefore having a handle of extremely “straight” grain seems difficult.  A big tree will no doubt produce blanks of straight grain, but not the smallish ash trees on my property.

Thanks for article.  If you can offer clarification on above thanks.

TB

MrBall
Jul 13, 2014

I was hoping you might have some ideas on how to store multiple handles for extended periods of time.

Ryan
Jul 07, 2014

I very much like olden days life styles and their connection with nature. I want to do my own axe, thank you for this information. It gave me suggestions to make my own axe, choosing of material & wood.

Dheeraj
Oct 21, 2013

I’d like to make handles for my tools,hammer,axes and a custom handle for hatches. Thank you for any help you might have. Phil

phil thompson
May 23, 2013

I’ve been wanting to make my own axe handle for a while and your instructions look good and simple to follow. Thank you for posting this.

Chris

Leave a reply

To ensure a respectful dialogue, please refrain from posting content that is unlawful, harassing, discriminatory, libelous, obscene, or inflammatory. Northern Woodlands assumes no responsibility or liability arising from forum postings and reserves the right to edit all postings. Thanks for joining the discussion.